What?! You’re building an awesome mobile app, like this one - iOS 7 Dynamic Type, and iOS 7 UserXListView, and get to the point where you need a backend. Oh no! Your complexity just increased exponentially.
Luckily the latest cloud computing XaaS (Everything as a service) is called a BaaS (Backend as a service). BaaS offerings include Parse (which was acquired by Facebook earlier this year), and the open source BaasBox. The idea is that a BaaS abstracts the complexity of building a backend.
But is building a backend really all that difficult using cloud computing? Let’s find out and build a cloud backend using node.js on AWS. Let’s get started.
Node.js
First download and install Node.js, which is a platform for building applications in JavaScript. It’s powered by the Google Chrome V8 JavaScript engine.
Isn’t JavaScript slow? No!
”V8 compiles JavaScript source code directly into machine code when it is first executed. There are no intermediate byte codes, no interpreter.”, https://developers.google.com/v8/design
Node.js is fast.
We’re going to use Node.js and node packages to expose web services for our awesome mobile app.
Why? There are lots of good articles that explain what Node.js is and what it’s good for. Here’s my simple take:
- The web has changed from consumption (viewing web pages) to interaction (apps, social media, chat). We need better client/server technology.
- Node.js is JavaScript on the server, which lowers the learning curve for developers.
- Node.js has a strong open source community. NPM (Node Package Manager) is a repository of reusable components. There are currently over 50 thousand, with over 3 million downloads per day.
The goal is to build a cloud backend - expose a RESTful web API that supports OAuth 2.0, with a database. This blog post should serve as the foundation to start you on that journey.
We will be using OS X Mavericks (Version 10.9), Terminal, and TextWrangler which is available free from the App Store.
Create and change to a new folder called cloudbackend from your Documents folder.
peters-mac-mini:Documents peterboni$ mkdir cloudbackend
peters-mac-mini:Documents peterboni$ cd cloudbackend/
peters-mac-mini:cloudbackend peterboni$
Create a file called package.json and put the following JSON data object in it.
{
  "name": "cloudbackend",
  "description": "",
  "version": "0.0.1",
  "private": true,
  "scripts": {
    "start": "node app"
  },
  "dependencies": {
    "express": "3.x"
  }
}
Use npm (Node Package Manager) to install Express, which is the dependency you identified in the above package.json file. Express is a web application framework. Enter ‘npm install’.
peters-mac-mini:cloudbackend peterboni$ npm install
npm http GET https://registry.npmjs.org/express
...
express@3.4.6 node_modules/express
├── methods@0.1.0
...
└── connect@2.11.2 (uid2@0.0.3, pause@0.0.1, qs@0.6.5, bytes@0.2.1, raw-body@1.1.2, negotiator@0.3.0, multiparty@2.2.0)
peters-mac-mini:cloudbackend peterboni$
Create a file called app.js with the following content. All we are doing here is exposing one HTTP GET method request, available at ‘/test’, which returns a JSON data object. A simple test.
var express = require('express'),
    http = require('http');

var app = express();

app.set('port', process.env.PORT || 3000);

app.get('/test', function(req, res) {
  res.json({'message':'hi'});
});

http.createServer(app).listen(app.get('port'), function() {
  console.log("Cloudbackend listening on port " + app.get('port'));
});
Let’s test it! Enter ‘node app’.
peters-mac-mini:cloudbackend peterboni$ node app
Cloudbackend listening on port 3000
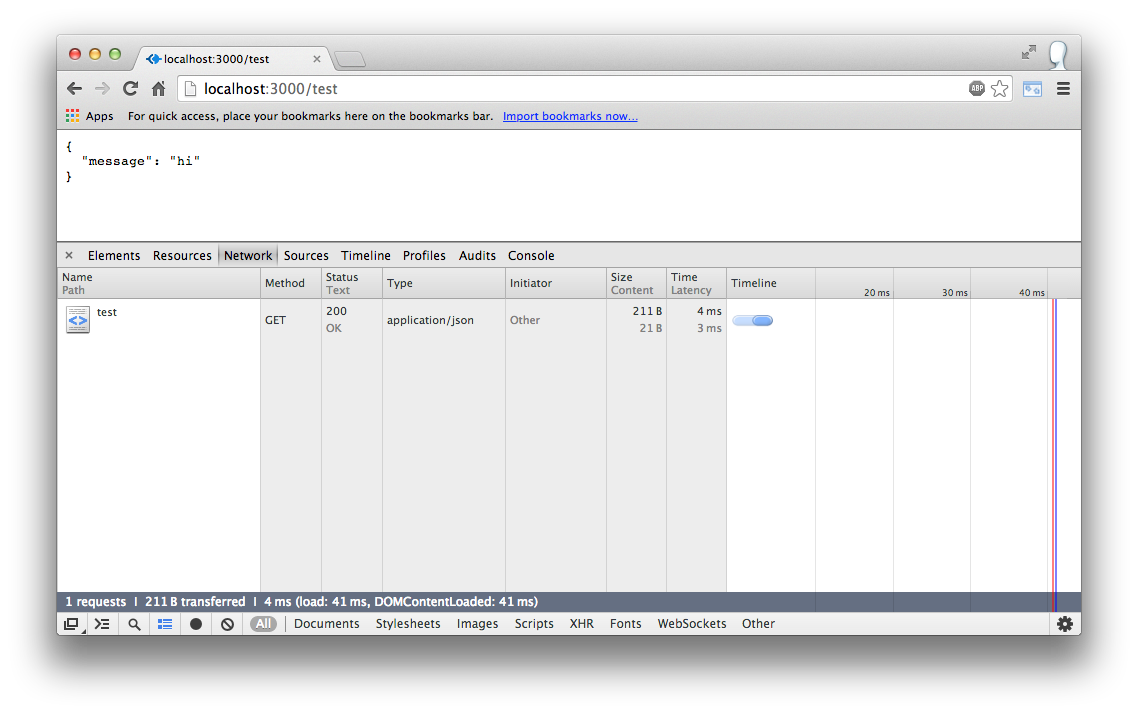
Now open your favourite web browser, and navigate to http://localhost:3000/test

Congratulations! You’ve just successfully built a RESTful web API with a single resource called test which is responding to a HTTP GET method request, and is returning a JSON data object.
Let’s deploy our backend to the cloud.
AWS
With AWS (Amazon Web Services) we can easily deploy our backend to the cloud while still keeping flexibility and control - things that a BaaS takes away by abstracting the complexity.
First sign up for the very generous AWS Free Usage Tier. This simple tutorial should not result in charges to your account.
We are going to deploy cloudbackend as an Application into EB (Elastic Beanstalk) which is an AWS Application Container. The Architectural Overview shows and explains what Elastic Beanstalk is.
- You deploy your application to EB and it gets a unique URL - http://myapp.elasticbeanstalk.com
- An Auto Scaling Group is created with at least 1 EC2 Instance (basically a VM - Virtual Machine).
- Traffic to your application URL first goes through the ELB (Elastic Load Balancer), and then to an EC2 Instance.
Once setup all AWS resources are automatically provisioned and configured. You have a fully auto load balanced, auto scaled cloud application environment.
Next, download and install Git.
Initialise your cloudbackend Git repository. Enter ‘git init’, followed by the other commands in the following console code block.
peters-mac-mini:cloudbackend peterboni$ git init
Initialized empty Git repository in /Users/peterboni/Documents/cloudbackend/.git/
peters-mac-mini:cloudbackend peterboni$ cat > .gitignore <<EOT
node_modules/
.gitignore
.elasticbeanstalk/
EOT
peters-mac-mini:cloudbackend peterboni$ git add .
peters-mac-mini:cloudbackend peterboni$ git commit -m "initial app"
[master (root-commit) 889e876] initial app
 2 files changed, 26 insertions(+)
 create mode 100644 app.js
 create mode 100644 package.json
peters-mac-mini:cloudbackend peterboni$
Next download and extract the AWS Elastic Beanstalk Command Line Tool to your Documents folder (the cloudbackend folder should be in your Documents folder).
Next add the appropriate EB Python folder to your PATH.
peters-mac-mini:cloudbackend peterboni$ export PATH=$PATH:/Users/peterboni/Documents/AWS-ElasticBeanstalk-CLI-2.5.1/eb/macosx/python2.7/
peters-mac-mini:cloudbackend peterboni$
If you have OS X Mavericks (Version 10.9) then you already have Python 2.7.5, else you will need to download and install it.
Next we’re going to create and configure the cloudbackend AWS Elastic Beanstalk Application Container. You basically enter ‘eb init’ and then follow the prompts.
- You will need to enter your AWS Access Key ID and Secret Access Key, which can be found at the URL given after you enter ‘eb init’.
- Select an AWS service region. I entered ‘7’ for ‘Asia Pacific (Sydney)‘.
- Accept the default application and environment names by pressing return.
- Enter ‘8’, for ‘64bit Amazon Linux 2013.09 running Node.js’.
- Enter ‘1’, for ‘LoadBalanced’.
- Enter ‘n’, to skip creating an ‘RDS DB Instance’.
- Enter ‘1’, for ‘Create a default instance profile’.
peters-mac-mini:cloudbackend peterboni$ eb init
To get your AWS Access Key ID and Secret Access Key,
  visit "https://aws-portal.amazon.com/gp/aws/securityCredentials".
Enter your AWS Access Key ID (current value is "AKIAJ*****GBOHQ"): [enter yours here]
Enter your AWS Secret Access Key (current value is "MhYxu*****rJfZx"): [enter yours here]
Select an AWS Elastic Beanstalk service region.
Available service regions are:
1) US East (Virginia)
2) US West (Oregon)
3) US West (North California)
4) EU West (Ireland)
5) Asia Pacific (Singapore)
6) Asia Pacific (Tokyo)
7) Asia Pacific (Sydney)
8) South America (Sao Paulo)
Select (1 to 8): 7
Enter an AWS Elastic Beanstalk application name (auto-generated value is "cloudbackend"):
Enter an AWS Elastic Beanstalk environment name (auto-generated value is "cloudbackend-env"):
Select a solution stack.
Available solution stacks are:
1) 32bit Amazon Linux 2013.09 running PHP 5.4
2) 64bit Amazon Linux 2013.09 running PHP 5.4
3) 32bit Amazon Linux 2013.09 running PHP 5.5
4) 64bit Amazon Linux 2013.09 running PHP 5.5
5) 32bit Amazon Linux running PHP 5.3
6) 64bit Amazon Linux running PHP 5.3
7) 32bit Amazon Linux 2013.09 running Node.js
8) 64bit Amazon Linux 2013.09 running Node.js
...
Select (1 to 28): 8
Select an environment type.
Available environment types are:
1) LoadBalanced
2) SingleInstance
Select (1 to 2): 1
Create an RDS DB Instance? [y/n]: n
Attach an instance profile (current value is "[Create a default instance profile]"):
1) [Create a default instance profile]
2) aws-elasticbeanstalk-ec2-role
3) [Other instance profile]
Select (1 to 3): 1
Updated AWS Credential file at "/Users/peterboni/.elasticbeanstalk/aws_credential_file".

peters-mac-mini:cloudbackend peterboni$
Now we just start it. Be patient as this will take a few minutes.
- Enter ‘eb start’.
- Enter ‘y’, to ‘deploy the latest Git commit to your environment’.
peters-mac-mini:cloudbackend peterboni$ eb start
Starting application "cloudbackend".
Would you like to deploy the latest Git commit to your environment? [y/n]: y
remote:
remote: error: Unable to deploy application version: No Environment found for EnvironmentName = 'cloudbackend-env'.
remote:
To https://...:...@git.elasticbeanstalk.ap-southeast-2.amazonaws.com/v1/repos/.../commitid/.../environment/...
 * [new branch]      HEAD -> master

Waiting for environment "cloudbackend-env" to launch.
2013-12-07 08:21:09 INFO  createEnvironment is starting.
2013-12-07 08:21:14 INFO  Using elasticbeanstalk-ap-southeast-2-558573496878 as Amazon S3 storage bucket for environment data.
2013-12-07 08:21:46 INFO  Created load balancer named: awseb-e-i-AWSEBLoa-SNLC5NAHWZWP
2013-12-07 08:22:06 INFO  Created security group named: awseb-e-ib22smbwaz-stack-AWSEBSecurityGroup-1DE3TWOH4AYLK
2013-12-07 08:22:10 INFO  Created Auto Scaling launch configuration named: awseb-e-ib22smbwaz-stack-AWSEBAutoScalingLaunchConfiguration-1NPGUDUWIC5YP
2013-12-07 08:23:07 INFO  Waiting for EC2 instances to launch. This may take a few minutes.
2013-12-07 08:23:07 INFO  Created Auto Scaling group named: awseb-e-ib22smbwaz-stack-AWSEBAutoScalingGroup-1BTN5S4LQA5BD
2013-12-07 08:23:10 INFO  Created Auto Scaling group policy named: arn:aws:autoscaling:ap-southeast-2:558573496878:scalingPolicy:5c8b171d-262b-4286-8bbd-76ff9db15845:autoScalingGroupName/awseb-e-ib22smbwaz-stack-AWSEBAutoScalingGroup-1BTN5S4LQA5BD:policyName/awseb-e-ib22smbwaz-stack-AWSEBAutoScalingScaleDownPolicy-18LWCZMRA7I4G
2013-12-07 08:23:11 INFO  Created Auto Scaling group policy named: arn:aws:autoscaling:ap-southeast-2:558573496878:scalingPolicy:d9a9f3df-b813-4ffe-9556-f2a7136aa69d:autoScalingGroupName/awseb-e-ib22smbwaz-stack-AWSEBAutoScalingGroup-1BTN5S4LQA5BD:policyName/awseb-e-ib22smbwaz-stack-AWSEBAutoScalingScaleUpPolicy-ZSDGPZ6KHCRQ
2013-12-07 08:23:14 INFO  Created CloudWatch alarm named: awseb-e-ib22smbwaz-stack-AWSEBCloudwatchAlarmHigh-1AAZW8L054YWY
2013-12-07 08:23:14 INFO  Created CloudWatch alarm named: awseb-e-ib22smbwaz-stack-AWSEBCloudwatchAlarmLow-1OAGDWAQFGJTO
2013-12-07 08:27:02 INFO  Successfully launched environment: cloudbackend-env
Application is available at "cloudbackend-env-yey9npuvjz.elasticbeanstalk.com".
peters-mac-mini:cloudbackend peterboni$
Let’s test it!
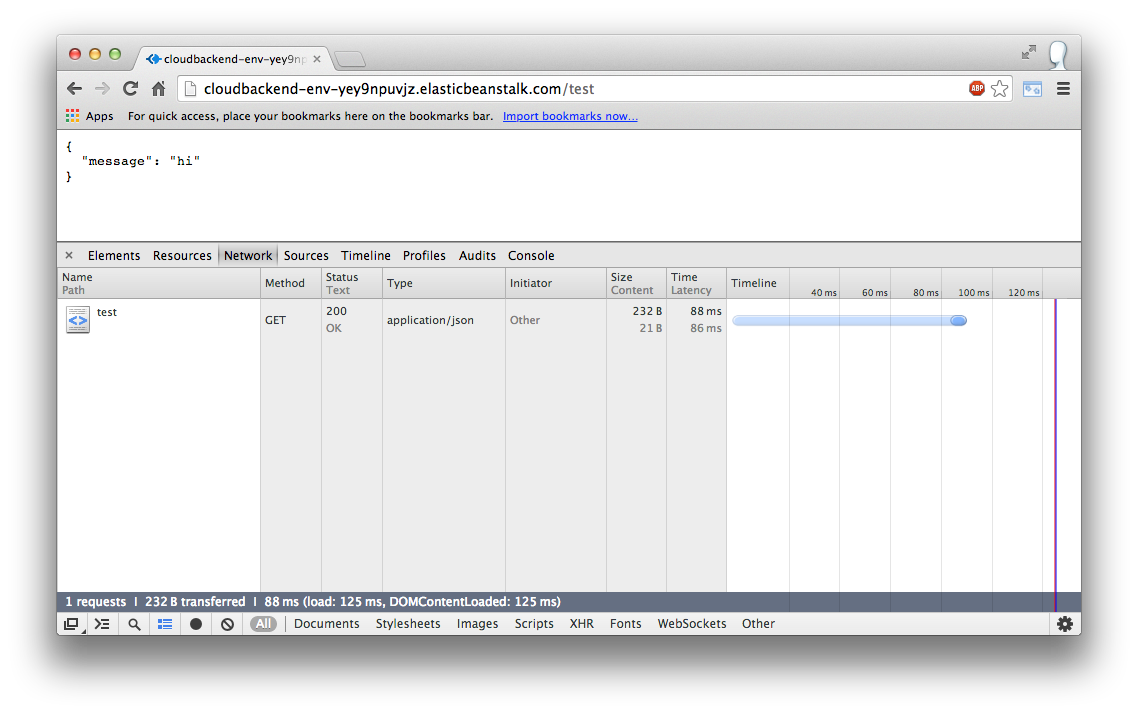
Open your favourite web browser, and navigate to http://cloudbackend-env-yey9npuvjz.elasticbeanstalk.com/test
Replace the domain part of the above URL with the domain you were given at the end of the ‘eb start’ process … Application is available at “cloudbackend-env-*.elasticbeanstalk.com”.

Congratulations! Your cloud backend is now working.
Now to work on that awesome mobile app!
Lastly if you want to stop and delete the environment, use the following EB command. Enter ‘eb stop’, and then ‘y’ to terminate the environment.
peters-mac-mini:cloudbackend peterboni$ eb stop
Terminate environment? [y/n]: y
Stopping environment "cloudbackend-env". This may take a few minutes.
2013-12-07 09:24:44 INFO  terminateEnvironment is starting.
2013-12-07 09:24:57 INFO  Deleted CloudWatch alarm named: awseb-e-ib22smbwaz-stack-AWSEBCloudwatchAlarmLow-1OAGDWAQFGJTO
2013-12-07 09:24:57 INFO  Deleted CloudWatch alarm named: awseb-e-ib22smbwaz-stack-AWSEBCloudwatchAlarmHigh-1AAZW8L054YWY
2013-12-07 09:25:00 INFO  Deleted Auto Scaling group policy named: arn:aws:autoscaling:ap-southeast-2:558573496878:scalingPolicy:d9a9f3df-b813-4ffe-9556-f2a7136aa69d:autoScalingGroupName/awseb-e-ib22smbwaz-stack-AWSEBAutoScalingGroup-1BTN5S4LQA5BD:policyName/awseb-e-ib22smbwaz-stack-AWSEBAutoScalingScaleUpPolicy-ZSDGPZ6KHCRQ
2013-12-07 09:25:00 INFO  Deleted Auto Scaling group policy named: arn:aws:autoscaling:ap-southeast-2:558573496878:scalingPolicy:5c8b171d-262b-4286-8bbd-76ff9db15845:autoScalingGroupName/awseb-e-ib22smbwaz-stack-AWSEBAutoScalingGroup-1BTN5S4LQA5BD:policyName/awseb-e-ib22smbwaz-stack-AWSEBAutoScalingScaleDownPolicy-18LWCZMRA7I4G
2013-12-07 09:25:03 INFO  Waiting for EC2 instances to terminate. This may take a few minutes.
2013-12-07 09:26:15 INFO  Deleted Auto Scaling group named: awseb-e-ib22smbwaz-stack-AWSEBAutoScalingGroup-1BTN5S4LQA5BD
2013-12-07 09:26:19 INFO  Deleted Auto Scaling launch configuration named: awseb-e-ib22smbwaz-stack-AWSEBAutoScalingLaunchConfiguration-1NPGUDUWIC5YP
2013-12-07 09:26:22 INFO  Deleted security group named: awseb-e-ib22smbwaz-stack-AWSEBSecurityGroup-1DE3TWOH4AYLK
2013-12-07 09:26:25 INFO  Deleted load balancer named: awseb-e-i-AWSEBLoa-SNLC5NAHWZWP
2013-12-07 09:26:28 INFO  Deleting SNS topic for environment cloudbackend-env.
Stop of environment "cloudbackend-env" has completed.
peters-mac-mini:cloudbackend peterboni$
If you get stuck, you can always try checking out the Amazon documentation - Deploying an Express Application to AWS Elastic Beanstalk.
I may cover topics like adding a custom domain name, SSL, OAuth 2.0 support, a database, or web pages to your cloud backend in future posts if there is interest.